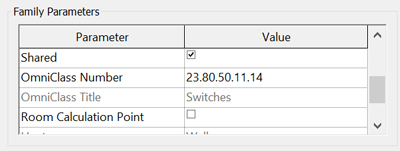
The Shared checkbox in the Revit family editor allows us to use nested families just like the root one.

Checking the Shared checkbox is only useful when this family is nested into another. When you load the root family into your project, Revit will also load the nested one. You will then be able to see it in the Project Browser and in schedules, and your shared family will behave just like any other families, except that it is nested into another.
This function is very useful to insert additional elements upon existing ones, according to specific rules.
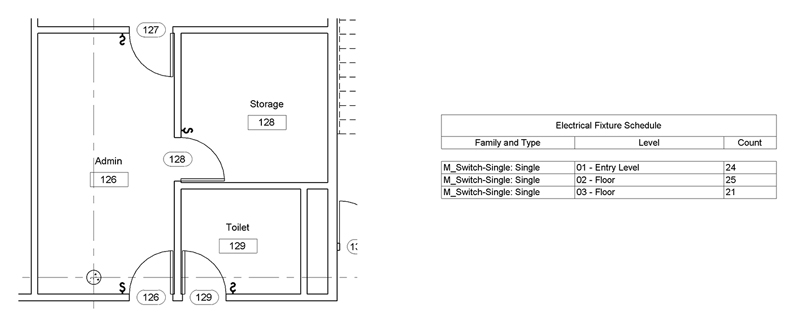
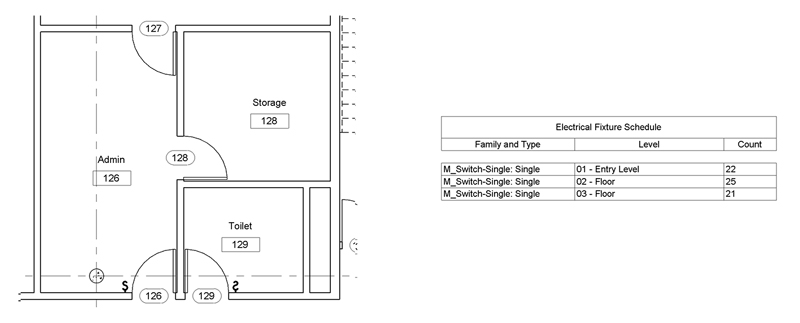
As an example, I add a light switch to a door family. This light switch is wall-based, and will appear alongside of every doors in the project. As this light switch is a shared family, these instances appear on the electrical fixture schedule.

Furthermore, these nested families only appear in schedules if they are visible in the project. I use this property to select on which door I want a light switch. I add a Yes/No parameter on my family to control the visibly of the switch. Once hidden in the project, the switch doesn’t appear in the schedule either.

Using shared families is a very efficient way to insert elements in a model, and is a good starting point for rule-based modeling.
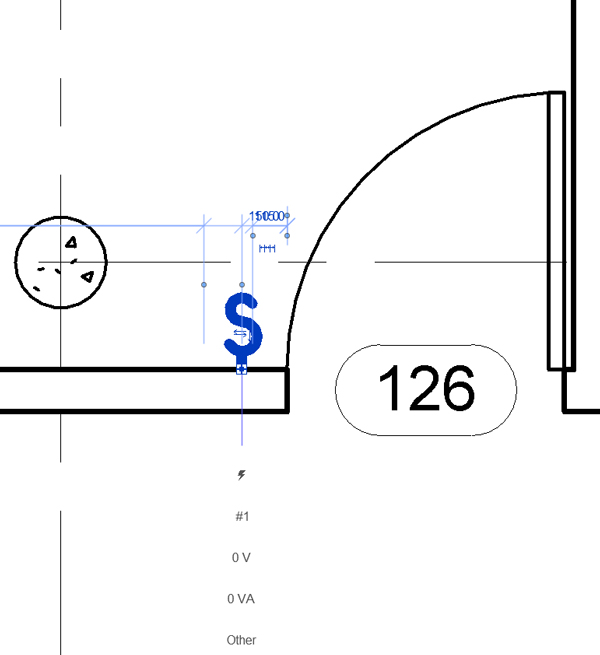
But once every light switch families have been inserted in the model through their host, we generally want to be able to adapt the position of some of these elements.
To do so, I wrote a few lines of code to create a copy of every nested light switch directly in the model. These new light switches are no longer nested, and can be easily modified to fit the local configuration. Furthermore, these elements are now electrical fixtures families, and can be added to an electrical circuit to perform load calculations.

public void ExtractNestedFamillies()
{
    UIDocument uidoc = this.ActiveUIDocument;
    Autodesk.Revit.DB.Document doc = uidoc.Document;

    //Select a family instance
    FamilyInstance fi = doc.GetElement(
        uidoc.Selection.PickObject(
            ObjectType.Element).ElementId)
        as FamilyInstance;

    // Create a filter to retrive all instance of this family
    List<ElementFilter> filters = new List<ElementFilter>();
    foreach (ElementId symbolId in
             fi.Symbol.Family.GetFamilySymbolIds())
    {
        filters.Add(new FamilyInstanceFilter(doc, symbolId));
    }
    ElementFilter filter = new LogicalOrFilter(filters);

    // Apply the filter to the elements in the active document
    FilteredElementCollector collector =
        new FilteredElementCollector(doc);
    ICollection<Element> familyInstances =
        collector.WherePasses(filter).ToElements();

    using (Transaction tx = new Transaction(doc))
    {

        tx.Start("Extract Nested Familes");

        //Loop on all family instances in the project
        foreach (Element element in familyInstances)
        {

            FamilyInstance instance = element as FamilyInstance;

            ICollection<ElementId> subElementsIds =
                instance.GetSubComponentIds();

            //Loop on all nested family
            foreach (ElementId id in subElementsIds)
            {

                Element ee = doc.GetElement(id);
                FamilyInstance f = ee as FamilyInstance;

                //The fammily is face based
                if (f.HostFace != null)
                {
                    Element host = f.Host;
                    Face face = host.GetGeometryObjectFromReference(
                        f.HostFace) as Face;
                    LocationPoint locPoint = f.Location as LocationPoint;
                    doc.Create.NewFamilyInstance(
                        face, locPoint.Point, f.HandOrientation, f.Symbol);
                }
                //The fammily is host based
                else if (f.Host != null)
                {
                    LocationPoint locPoint = f.Location as LocationPoint;
                    Level level = doc.GetElement(f.LevelId) as Level;

                    FamilyInstance fam = doc.Create.NewFamilyInstance(
                        locPoint.Point, f.Symbol, f.Host,
                        level, StructuralType.NonStructural);

                    //Flip the family if necessary
                    if (instance.CanFlipFacing)
                    {
                        if (instance.FacingFlipped) { fam.flipFacing(); }
                    }
                    if (instance.CanFlipHand)
                    {
                        if (instance.HandFlipped) { fam.flipHand(); }
                    }
                }
                //The family is point based
                else
                {
                    LocationPoint locPoint = f.Location as LocationPoint;
                    Level level = doc.GetElement(f.LevelId) as Level;
                    doc.Create.NewFamilyInstance(
                        locPoint.Point, f.Symbol, level,
                        StructuralType.NonStructural);
                }
            }
        }
        tx.Commit();
    }
}