A year after my first post about Autodesk A360, I kept on testing its features as they came out. When one of my colleagues brought me an A360 Team subscription from last year Autodesk University, I tested it on a small project with some of my teammates.
Recently, Autodesk unrolled a new design for A360. I use this occasion to share my thoughts about the evolution of the service since my last post.
Starting using A360 is really easy. Just invite your teammates to your A360 hub, drag and drop documents to the platform, and start editing or commenting them. Basically, anyone can edit anything, the revision control system is here to retrieve any previous version of a document in case of emergency.
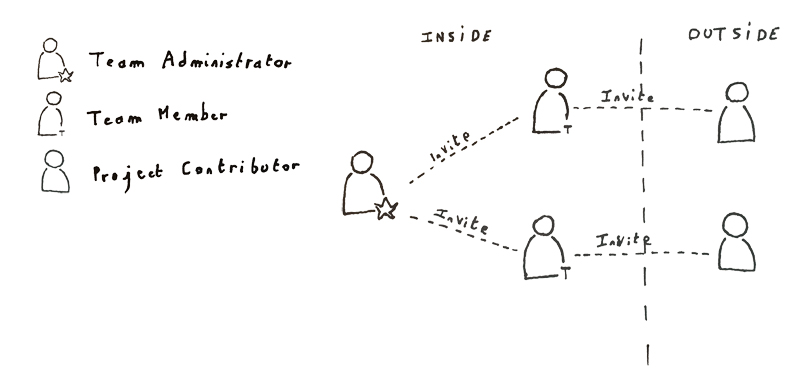
Roles and permissions are organized around Team Members, who belong to an organization and have access to every project inside this organization. These Team Members can invite Project Contributors outside of the organization to participate on a specific project.

Different project types allow for different accessibility rules for Team Members and Project Contributors. However, don’t expect to find tune every option, we are not in a tightly controlled document management system, but more on a collaboration platform based on trust and a powerful versioning system.
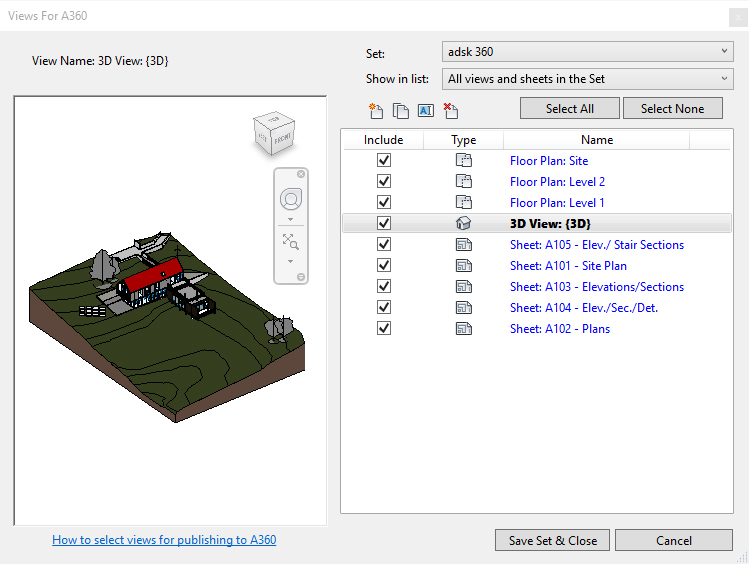
Of course, A360 provides the ability to upload Revit models, and process them as they arrived on the platform. To me, this is the most important feature. Every model you upload on A360 will be processed to be visible online, without having to download it. This feature has largely improved since my last article, and you can now select which views and sheets that will appear on A360. To do so, open the Views For A360 windows in Revit and create a set of views to be uploaded to A360. Save your model, upload it, wait for a while and every selected view will appear on the model page.

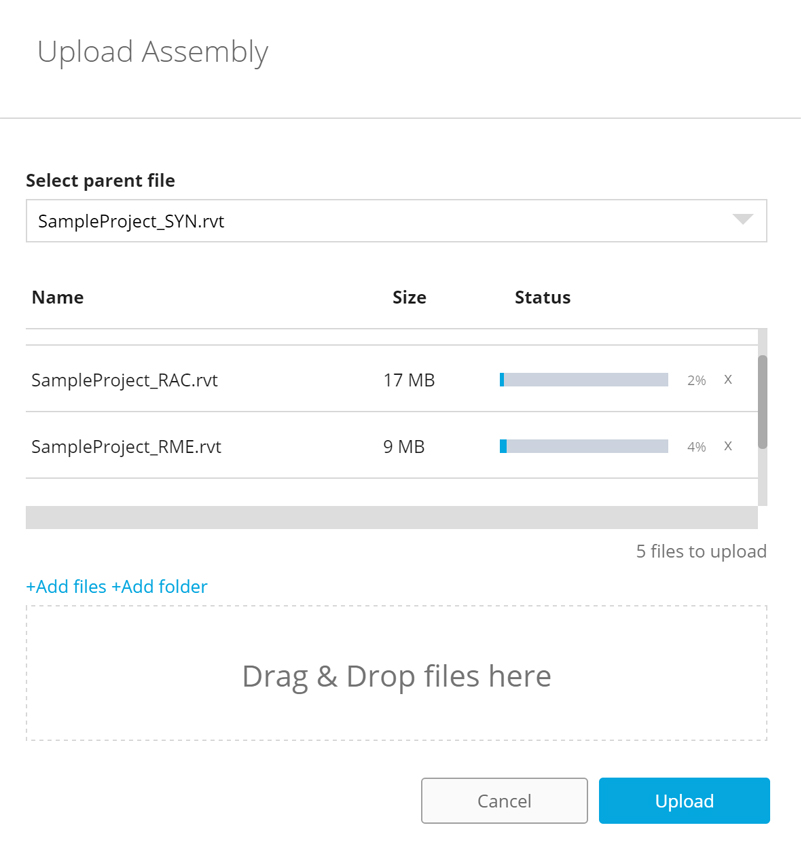
You can upload a single file or an assembly, which is a set of files linked together. When uploading an assembly, A360 asks for a parent file and uploads it along with every other file in the same folder. As it is processing this parent file, it takes these linked models into account to create online views.

My first impression of the online 3D viewer is quite good. It is fluid and really easy to use. One of the wishes of my previous article have been fulfilled, you can now create Sections of your model. Sections are beautiful, with a nice cut pattern, but the section plane is barely usable. Instead of being able to quickly select a face of your model to create a section plane, you have to painfully drag a predefined plane where you want to cut your model. Since the section plane gizmo stays aligned with the model origin, you can’t move it while zooming. I have to say I was pretty frustrated by the experience, seeing everything I was hoping for a web-based model viewer, and not being able to use it because of these few issues.
And why the Measure tool shows up when the model is loading and disappears when the viewer had started?
Aside from the current issues of the 3D viewer, Autodesk has created a really interesting collaboration platform. Roles and permissions manage to stay simple while enabling most collaboration scenarios. I still have to test the integration within Revit through the A360 Collaboration for Revit, as soon as it will become available in Europe.