Phases are a very interesting feature in Revit, allowing us to place our project in time. Phase can also become a major headache when not used properly, so in order to understand it, I wrote a few lines about it.
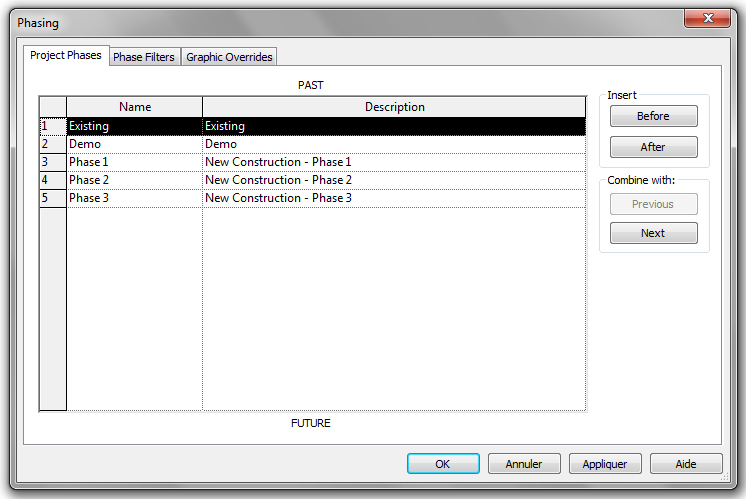
The first step while working with Phases is to define them, in the Project Phases tab of the Phasing window:
Once these phases are created, a lifespan can be defined for every object in our Revit model. To do so, every building element has two properties, Phase created and Phase Demolished. These two properties define the life of our object, when it is created and when it will be demolished.
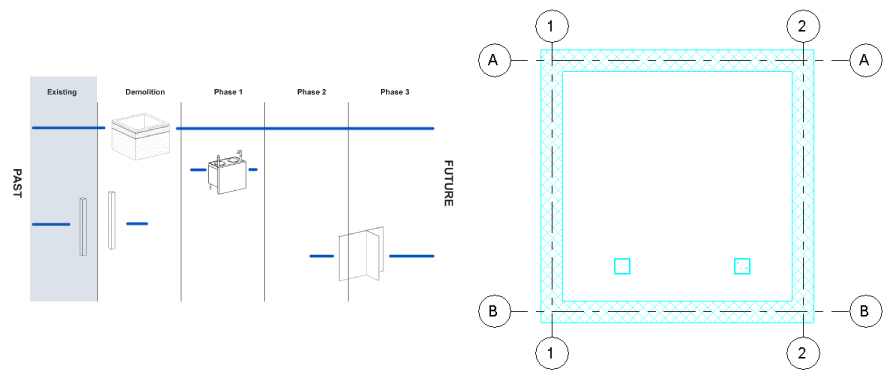
To illustrate this, we create a few object and place them on a timeline:
- Four walls, “created” during the Existing phase and never demolished.
- A small kitchen, created in Phase 1 and demolished in the same phase.
- Two columns, “created” during the Existing phase and demolished in Demo phase.
- Three partitions walls, created in Phase 2 and never demolished.
To place ourselves on this timeline, every view has a Phase parameter. This position in time define how Revit will display elements regarding their life cycle.
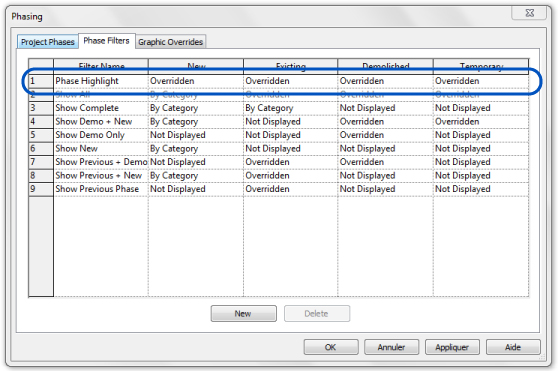
To illustrate my explanation, I create a new phase filter, called Phase Highlight, with the following properties:
I also create graphic overrides to change object colors by their phase status:

Every element created in the current phase and not demolished during this phase has the New phase status. For example, if we place ourselves in the Existing phase, the four walls and the columns had just been created, and appear in cyan (New status graphic override):
Every element created during an earlier phase, and not demolished this phase are in the Existing status. If we place ourselves in the Demolition phase, we can see the four wall becoming red (Existing status graphic override):
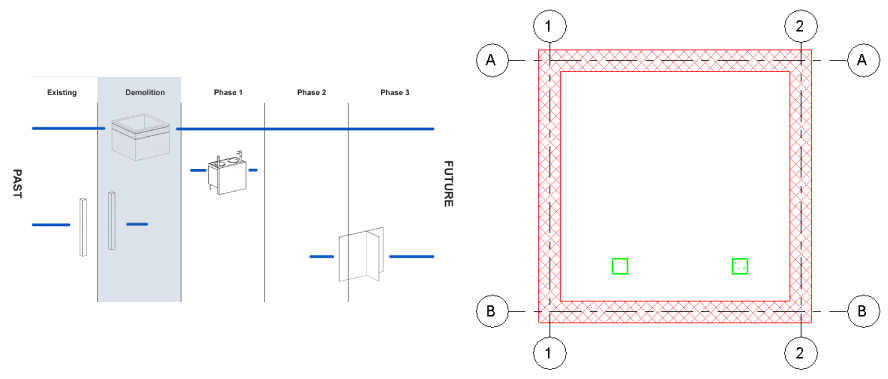
But if this element is demolished during this phase, and has been created on an earlier phase, it had the Demolished status, like the two columns in this example.
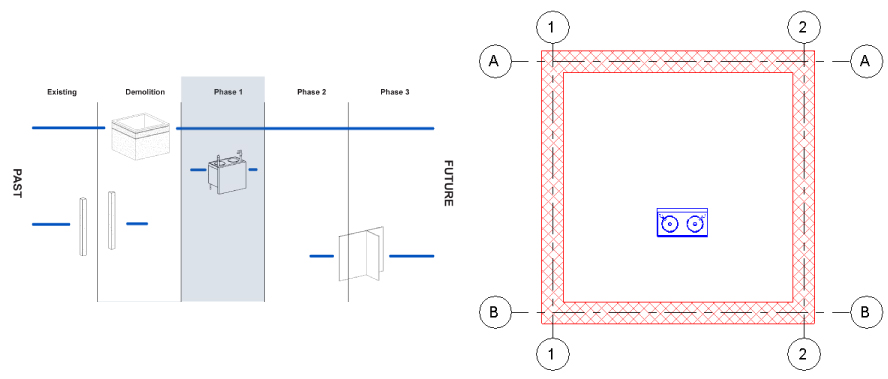
If the element is created and demolished in the current phase, it take the Temporary status, like the kitchen in this example (Blue is the Temporary Status override):
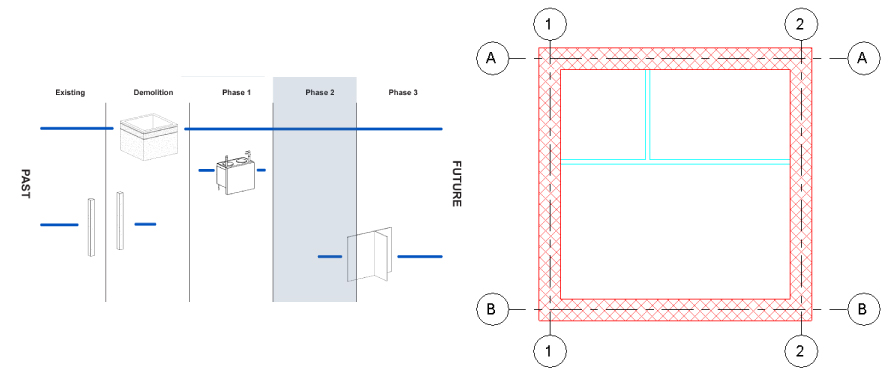
Since elements are displayed only if they are actually present during the current phase, we have to place ourselves in the Phase 2 to be able to see the partitioning walls:
If an element is not fitting in any of the four Phase Status, it is not displayed at all, meaning that we cannot display an element that appear in a future phase.