I recently had some questions on how to start programing in Revit, so I will present here a simple macro created with the embedded macro editor, SharpDevelop.
As an example, I will create a macro for tagging all wall in a given view. Even if this function already exist through the Tag All command, you will see all the possibilities for creating it with a macro.
This week, we will see how to create a macro and retrieve elements draw in our model.
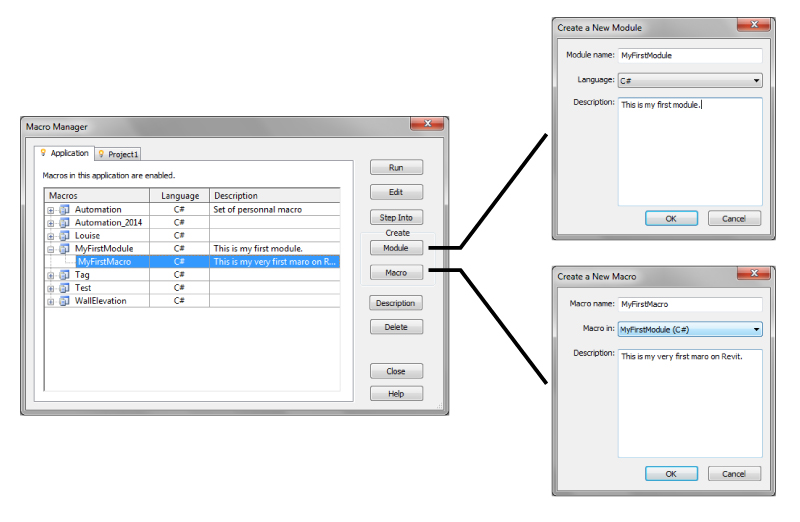
Let’s start it by clicking on the Macro Manager on the Manage tab:

This is where you create new function in Revit, called “Macro”. These macro are lines of code, conveniently stored in a “Module”.
After creating a new module, and creating a new macro in this module, Revit starts its embedded code editor, called SharpDevelop. This is where we are going to spend most of our time developing Revit macro.
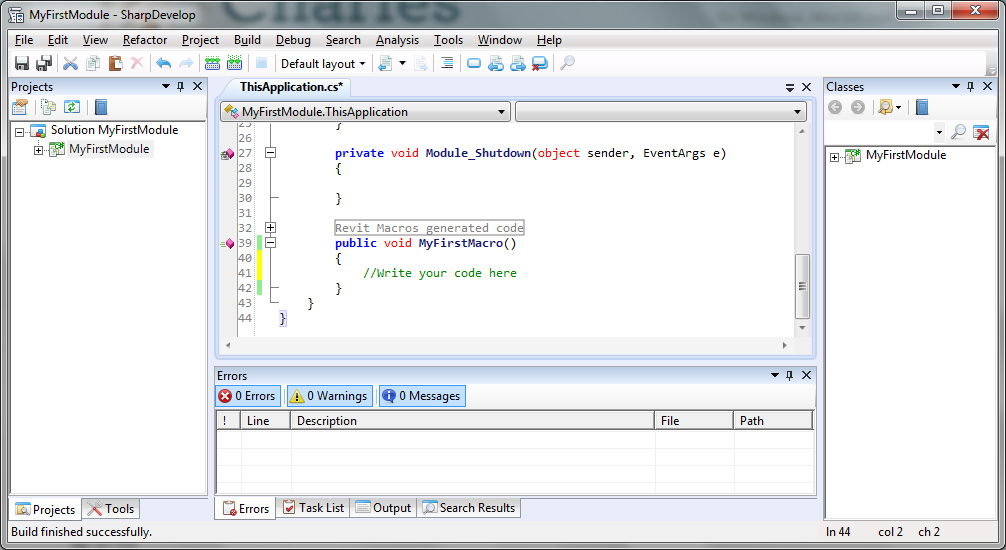
We can see the name of our macro just after “public void” and before a pair of brackets. We will write all our code between these brackets.
Every action done within Revit are made within a document, generally a .rvt or .rfa file. We have to explain this in our macro by retrieving the current document
Let’s write this:
Document myDocument;With this line, I explain to Revit that something, a variable, called “myDocument” is a Revit Document.
Don’t forget the trailing “;”, it means the end of the line and has to be placed after every instruction line in a Revit macro.
Then, we write this:
myDocument = this.ActiveUIDocument.Document;With this line, we explain than myDocument is actually the active document, the Revit document I am currently working with. “this” mean here “this Revit application”.
To be able to annotate every walls in a view, we have to select this view. Here, we call our view myActiveView and set it to the currently active view, the one you are looking at right now.
View myActiveView = myDocument.ActiveView;Now than our Revit document and the view are selected, we have to retrieve walls to be able to annotate them. The Revit API provide us with a great function, the ability to filter element by category, type, class, … well, pretty much everything.
First, let’s create our filter, with the keyword “new”:
FilteredElementCollector filter
= new FilteredElementCollector(myDocument,myActiveView.Id);
This “filter” will search for every element contained in “myDocument” and visible in the view “myActiveView”. The “.Id” after “myActiveView” mean that we use the unique identifier of the view instead of the view itself to create our filter.
We can now use this filter to actually catch some walls. Let’s write that:
List<Element>myWalls
= filter.OfCategory(BuiltInCategory.OST_Walls).ToList();
We create a list of Revit element named myWalls and retrieve every element of the category Wall (“BuiltInCategory.OST_Walls”). The trailing “.ToList()” convert our filter into an actual list of elements.
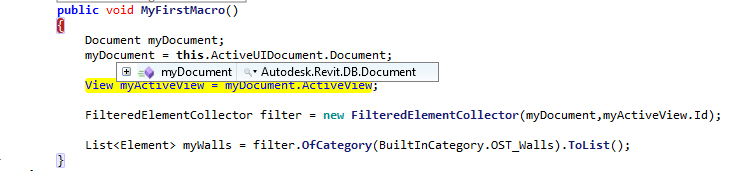
Before going any further, we try this. Back in Revit, we draw four walls and run our macro by selecting it in the Macro Manager and hitting “Step Into”. This sends us back to SharpDevelop, with slight changes in the interface, and a yellow highlight on the first line of our macro. This highlight show us which line of our macro is currently executed. Hit “F11” two times to pass the first line.
If we pass our cursor on “myDocument”, a hint appear, showing us than “myDocument” is actually a document.
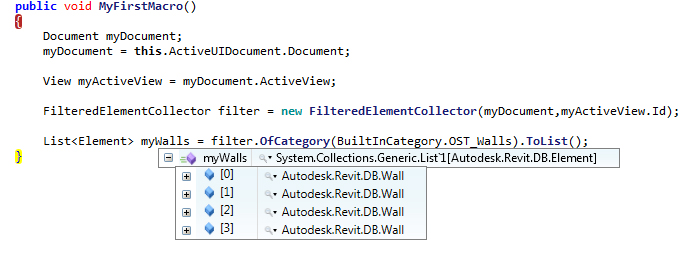
Let’s hit “F11” a few time to pass the last line. Stop right after it. If we pass our cursor on “myWalls” and click on the small “+” in the highlight, we see the list of walls retrieved by our filter. Everything works as expected, so far.
We hit “F5” to run in a single stroke the remaining line of code and go back into SharpDevelop.
Next week, we will see how to use this list of walls to create a tag for every one of them.